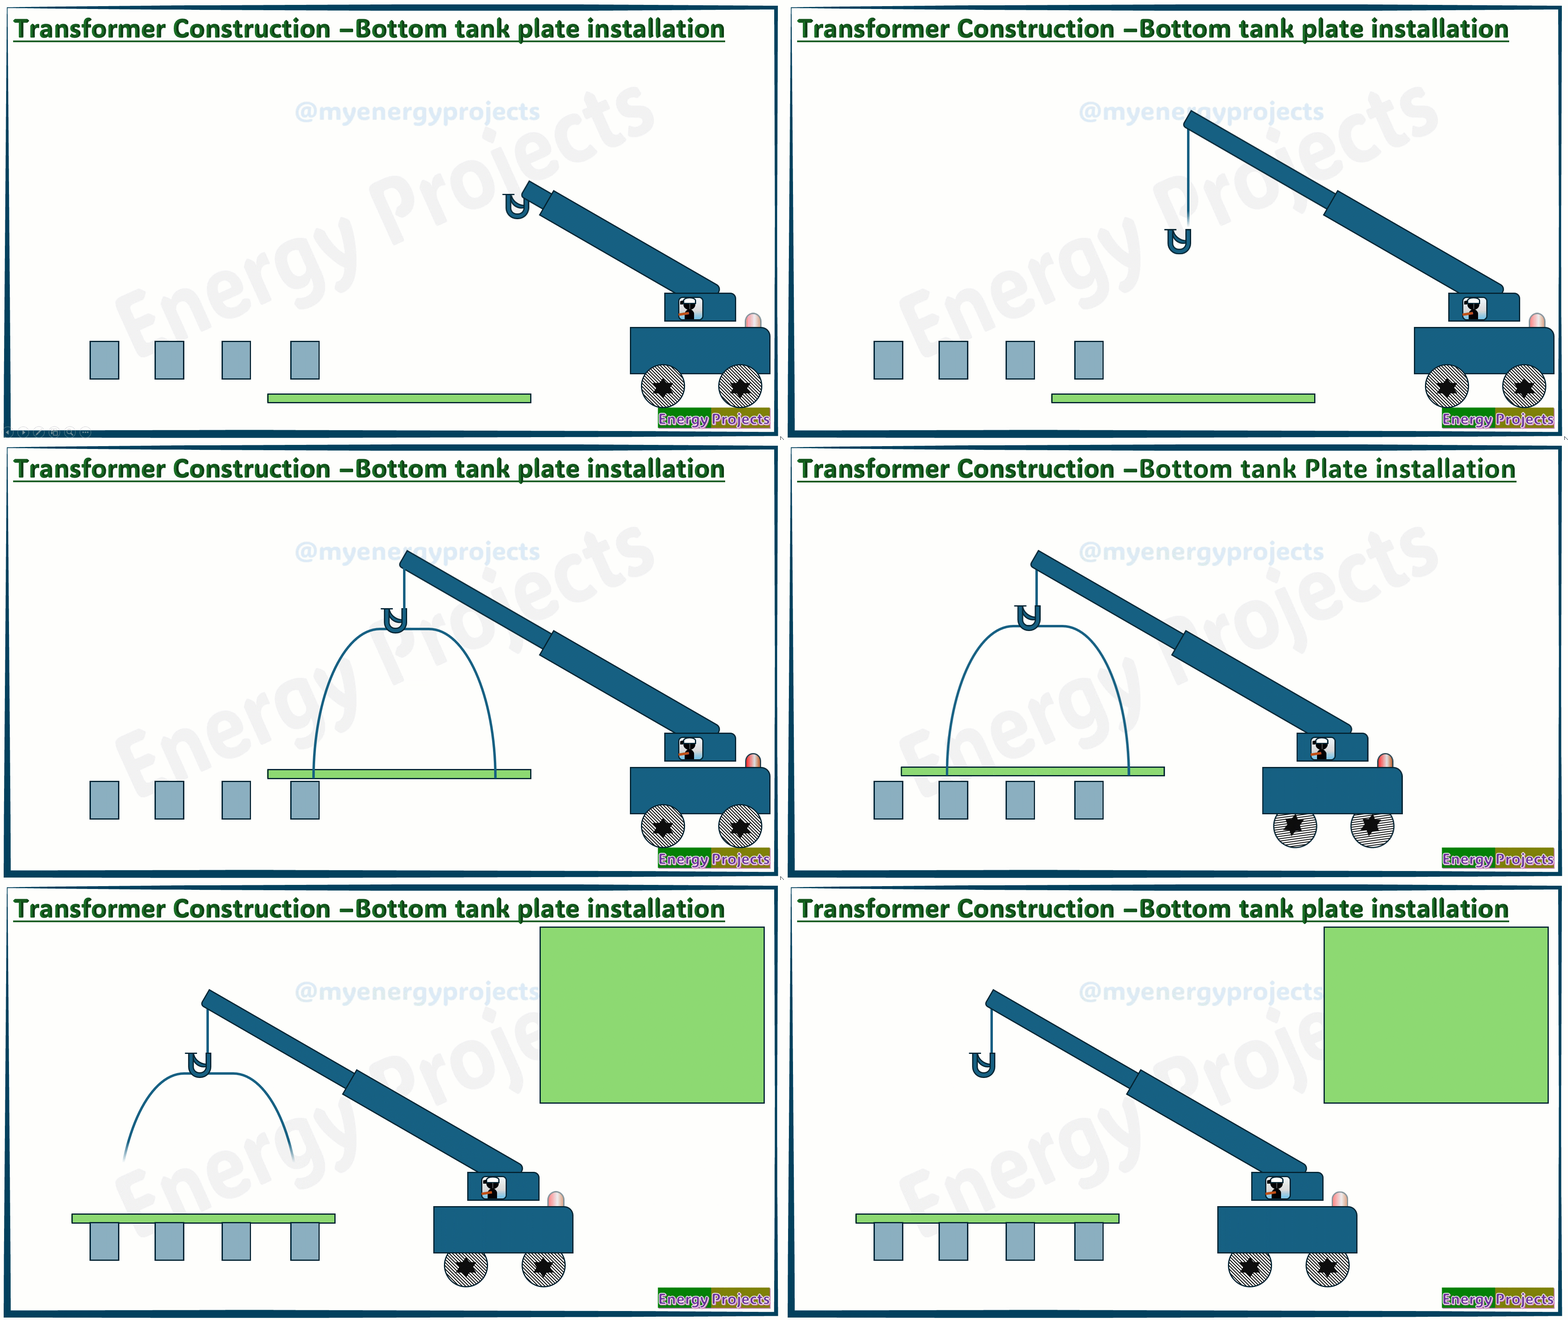
1. Preparation of Work Area
Before starting the installation, it is essential to prepare a clean and organized workspace. The surface should be flat and stable to support the heavy bottom tank plate without causing any deformation. All necessary tools, equipment, and safety gear must be arranged within easy reach to ensure smooth workflow. Additionally, safety protocols should be checked and enforced to prevent any accidents during the handling and installation process.
2. Inspection of Bottom Plate
The bottom tank plate must be thoroughly inspected prior to installation. This includes checking for any physical damage such as dents, corrosion, or warping that could affect the structural integrity of the tank. Dimensional accuracy should also be verified against the design drawings to ensure the plate will fit correctly. Surface cleaning is crucial to remove any dust, oil, or rust that might interfere with welding or sealing later on.
3. Positioning the Bottom Plate
Using appropriate lifting equipment such as an overhead crane and slings, the bottom plate is carefully moved to the assembly area. It is crucial to position the plate precisely according to the layout drawings to avoid misalignment. Proper coordination between the crane operator and ground personnel helps prevent damage to the plate during handling. Once positioned, the plate should rest firmly on the assembly platform or base frame without any undue stress.
4. Leveling and Alignment
After positioning, the bottom plate must be leveled and aligned accurately to maintain the overall tank geometry. Tools such as spirit levels or laser levels are used to check the horizontal flatness of the plate surface. Any unevenness is corrected by placing shims or supports underneath the plate. Additionally, measurements are taken to ensure the plate is square and aligned with reference points on the assembly platform.
5. Tack Welding
To secure the bottom plate in place temporarily, tack welds are applied at strategic points, typically at the corners and along the edges. These welds hold the plate firmly and allow for minor adjustments if needed before full welding. After tack welding, it is important to re-verify the alignment and flatness to confirm that no distortion has occurred. Proper tack welding helps maintain dimensional accuracy throughout the assembly process.
6. Installation of Side Walls or Stiffeners
Once the bottom plate is secured, side walls or stiffeners are positioned and aligned along its edges. These components are essential to provide structural strength and shape to the transformer tank. Care must be taken to ensure that the walls or stiffeners are perpendicular and flush with the bottom plate. Tack welding these parts temporarily allows for adjustments and holds them in place for full welding later.
7. Full Welding
Full welding involves joining the bottom plate with the side walls and stiffeners permanently. A welding sequence is planned and followed to minimize heat-induced distortion and stresses. Welders use appropriate welding techniques and parameters to ensure strong, defect-free welds. Interpass temperature and welding speed are carefully controlled to maintain material integrity.
8. Post-Weld Inspection
After completing the welds, a thorough inspection is conducted to verify the quality and dimensional conformity. Visual inspection helps identify surface defects such as cracks, undercuts, or porosity. Non-destructive testing (NDT) methods like dye penetrant or ultrasonic testing may be used to detect internal flaws. Measurements are repeated to confirm that welding has not caused warping or misalignment.
9. Surface Finishing and Cleaning
Following inspection, weld beads may be ground smooth to improve the tank’s appearance and prepare for coating. All welding slag, spatter, and contaminants are removed to ensure a clean surface. The plate is then cleaned with solvents or abrasive tools to prepare it for any corrosion protection treatments. Applying primers or anti-rust coatings at this stage helps extend the tank’s service life.
10. Documentation and Quality Records
Proper documentation of the installation process is vital for quality assurance and traceability. All inspection reports, welding logs, and dimensional check results are recorded and reviewed. Any deviations or repairs are noted along with corrective actions taken. Maintaining these records ensures compliance with project specifications and industry standards, facilitating smooth project audits and future maintenance.


